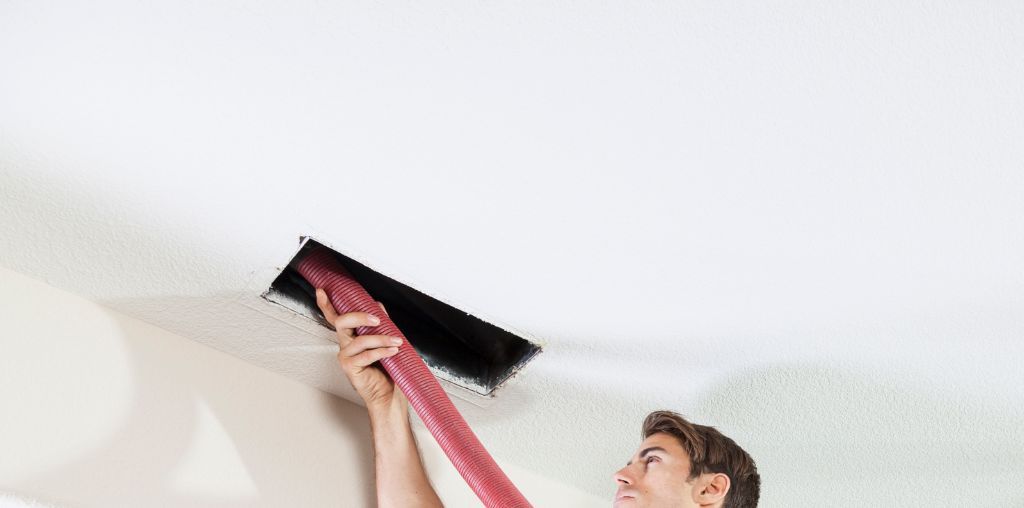
Air Duct Cleaning: The DIY Approach
Cleaning your home seems to be an ongoing task with no end in sight. As soon as you’re done cleaning, dust comes out of nowhere. And it’s not because you haven’t cleaned your home well, but because you missed cleaning the air ducts.
Air ducts accumulate dust, dirt, pollen, pet hair, and debris over time. These spread all over your home whenever you activate the HVAC system. Cleaning them regularly will ensure you and your family have clean, quality air in your home.
DIY air duct cleaning isn’t as complex as you may think. Although it takes some time, it doesn’t require special gear.
So, how to clean air ducts DIY?
Cleaning the air ducts in your home is straightforward and doesn’t require special skills or equipment. In this article, we show you exactly how to do it step by step to get rid of the hidden debris in your home easily.
When Should You Clean Air Ducts DIY?
Cleaning the air ducts is essential for improving your home’s air quality. They collect dust, hair, and allergens, instantly spreading them into your home when you turn the system on. Moreover, they may develop mold or trap insects and pests like mice.
Cleaning air ducts DIY regularly helps prevent these manifestations, keeping your home safe and healthy.
So, when should you clean air ducts?
The general rules of air duct cleaning frequency are as follows:
- Twice a year – in spring and fall, before activating the seasonal HVAC systems.
- Once a year, if you or someone in your home has allergies and/or if you have pets.
- Every 3 to 5 years, if there aren’t specific situations or people with health issues in your home.
- When renovating your home or having major repairs.
- When buying a new home.
- When the ductwork is over 7 years old, and when you audit the system for leaks.
However, you should immediately clean air ducts if you notice a lot of dust after cleaning your home or if there’s an odor upon turning on the HVAC system. The same goes for extensive pest damage, pest/animal nests, or larger quantities of mold.
Deteriorated sealants or tape and/or improperly sealed ducts are another reason for immediate air duct cleaning.
The Benefits of Cleaning Air Ducts DIY
Regular ductwork cleaning is underrated and often overseen. But clean air ducts bring many benefits to your family and your home.
- More efficient HVAC system. Removing obstructions from air ducts improves airflow, which results in a more efficient HVAC system.
- Lower utility bills. A highly efficient HVAC system can lead to lower energy consumption and reduced utility bills.
- On-demand cleaning. You have the flexibility to clean your air ducts whenever you need, ensuring a cleaner and healthier environment at all times.
- Improves air quality. Air duct cleaning diy helps remove accumulated dust, pests, and other contaminants, resulting in cleaner air circulating throughout your home.
- Removes allergens and air pollutants. Cleaning the air ducts eliminates allergens like pollen and air pollutants like dust particles from your home, promoting a healthier living space for your family.
- Ensures evenly heating/cooling in all your rooms. An HVAC system with clean air ducts ensures proper airflow throughout your home.
- Fights bad smell and odor. Cleaning the accumulated dirt and contaminants from your air ducts eliminates unpleasant smells and odors in your home.
- Chases the pests away. When cleaning the HVAC ductwork, you remove pests like insects or rodents that have made their way into it, reducing the risk of nesting, infestation, and related issues.
What DIY Air Duct Cleaning Tools You Need?
Before you start cleaning the air ducts, make sure you have all the tools from this list:
- A vacuum cleaner equipped with a hose and a nozzle attachment
- Brush – A HVAC system cleaning brush, a large paintbrush, or a toilet brush
- Screwdriver
- Paper towels or rags for covering and cleaning the registers
- Microfiber cleaning cloth for cleaning the ducts
- New furnace air filter
- Protection gear, including goggles, a gas mask, and gloves.
DIY Air Duct Cleaning: Step-by-Step Guide
Cleaning the ductwork yourself isn’t challenging if you know what you’re doing. To save you time searching for the best air duct cleaning methods, we’ve compiled a list of all the steps you need to follow.
Never done it before?
No problem. We’ll walk you through each stage of the air duct cleaning process.
Remove the Registers
Remove the supply and return air registers (the vents from which the conditioned air comes into your home) using a screwdriver. If they have a screw-less design, twist them counterclockwise.
Once removed, cover them with rags or cloths, preventing the dirt accumulated on them from falling onto the floor and spreading throughout your home.
Turn On the Fan
Next, you need to turn the fan on and turn off the “heat/cool” mode. You can run the heat if you don’t have a standalone heating/cooling mode.
Having the fan on during the cleaning process helps dislodge dust and particles from the ductwork, and this helps you remove them much more easily.
Clean the Supply Registers
Clean the supply registers with the rags you have covered them with, or use a brush. Make sure you clean them thoroughly. If they’re very dirty, use a mild cleaning solution mixed with water to help break down grime.
Once cleaned, dry them, and reattach them.
Clean the Return Air Registers
Use a brush to loosen any dust and dirt that may have built up on the surface. Once loosened, vacuum-clean the dislodged dirt from the return air registers using a vacuum cleaner with a brush attachment.
Take your time to clean each register to remove all visible dust thoroughly.
Turn Off the System
Turn off the HVAC system completely to prevent the fan or other settings from accidentally turning on while cleaning the ducts. Having the system turned off ensures your safety and allows for a more focused cleaning experience.
Loosen the Dust in the Ducts
Use your brush to clean the ducts effectively. Gently insert the brush into the ductwork, reaching as far as you can. Move it back and forth to loosen the dust and debris that may have accumulated on the inner walls of the ducts.
Vacuum-clean the Ducts
Attach a hose and a brush extension to your vacuum cleaner. Insert the hose into the ducts and move around to reach as many parts of the duct as possible. This will help you suction up the dust and debris you previously loosened with the brush.
Repeat the process with all ducts. Make sure you clean all accessible areas and vacuum all the debris you can.
Clean the Blower Compartment
The blower compartment is usually found near the furnace or air handler. Open it and check it for any dirt, dust, or debris.
Use a brush or a microfiber cloth to carefully clean the fan blades, motor, and surrounding surfaces. Clean as gently as possible to prevent damage to any components or wiring during the cleaning process.
Replace the Air Filter
In most systems, the air filter is usually near the blower or furnace. Once you locate it, carefully remove it and insert a new filter, following the manufacturer’s instructions.
The new filter must be compatible with your system and fit properly.
Turn On the System
Turn the HVAC system back on, adjust the thermostat to the desired temperature, and switch to a heating or cooling mode. Check the airflow to ensure it’s steady and consistent.
Let it work for 20 minutes to see if there are any unusual noises or issues. If everything works well, you’ll know you did a great job. Congrats!
Air Ducts: DIY or Professional Cleaning?
Cleaning air ducts DIY is a cost-effective option if you feel comfortable doing basic maintenance tasks. With the right tools and following the steps described in this article, you’ll clean your air ducts without much trouble.
However, if there’s a mold infestation, which has to be tested, or deep-seated contaminants, you need to call a professional cleaning service. Air duct cleaning services have the expertise, specialized equipment, and experience to perform a thorough cleaning of air ducts.
It’s up to you to decide whether you clean the air ducts yourself or call experts. The decision relies on your skills and your HVAC system’s specific needs.
FAQ
Can I clean my own HVAC ducts?
Yes. If you have the required DIY air duct cleaning tools and feel comfortable doing it, you can clean the HVAC ducts in your home.
Can I spray vinegar in air ducts?
Yes. Vinegar can help break up the dirt in the ductwork so that you can clean them more easily. Use a mix of ¼ cup of vinegar with 2 cups of water in a spray bottle.
What time of the year is best for duct cleaning?
Spring is the best time of the year for air duct cleaning to prepare the HVAC system for the new season.
How do professionals sanitize air ducts?
Professional air duct cleaning services may use various types of sanitizers, such as a fogger, a specific antimicrobial product, and a gigantic vacuum cleaner.
Table of Contents
Other Blogs You May Be Interested In






Leave a Reply