
Author: Steamy Concepts

The Ultimate Guide For Choosing the Right Bathroom Tiles

The most frequently used room in the house is without a doubt the bathroom thus making it the most essential room in the house. How you are going to decide to style it sets the feel for the space and it solely depends on your preference and needs. The most common choice is tiles as they come with many advantages.

Tiles are not only practical, easy to clean, and hygienic, but they also provide you with various choices of color, size, style, shape, finishes, and material. They truly work wonders in decorating the space giving you an infinite number of possibilities.

But the design isn’t the only important thing when choosing a bathroom tile. The quality of the material determines the level of maintenance so you should look twice before making the final decision. 

To learn more on how to choose bathroom tiles, continue reading and follow our step-by-step instructions.

Choosing Bathroom Tile: Step-by-Step Instructions

There are several things you need to consider before actually buying the tiles and those are style, color, size, and quality. This is how to choose a tile for the bathroom. You need to consider all of these parameters and ultimately know what you actually like.

Decide on a Design

Just like any other product quality and design is key. You wouldn’t want to choose something that isn’t pleasing to the eye, even if the quality of the product is good, the look of the design is what sets the mood. Before you make the choice, think about the style of your home and from there choose a design that is complementary to the style of the rest of your home.

Pick a color

Ultimately the decision of what color to choose for your bathroom tiles falls on you, but you should consider some factors before deciding. Light color tiles make the room appear larger, while dark colors close up the space and make it look more intimate. If your bathroom has access to a lot of natural light then it is advised to use darker color tiles but if not, then lighter colors can provide the missing warmth to the space.

 Pick a Size

To make the right decision in choosing the right tile size you need to consider the size of the room. Big tiles are usually used in decorating small spaces to give the room an airier feel and make it seem bigger than it is. Big bathroom tiles with few grout lines can provide the illusion of a much larger space. If you have a big bathroom, both big and small tiles can look good as long as you choose the right colors. 

Ease of Maintenance

Different tile textures require different maintenance. Tiles with a rougher surface like natural stone tiles (marble and travertine) are prone to trapping dirt in the crevices making them more difficult to clean. They are also easy to stain and need special cleaning products to keep them looking fresh.

Unlike them, smooth tiles like glazed ceramic or porcelain do not require this much work and they are some of the most popular options, but you should also keep in mind that tiles with a glossy finish are harder to clean than tiles with a matte finish.

How to Choose Bathroom Floor Tile: To Match or Not to Match?

Many designers oftentimes decide to use the same tiles for the floor that were used for the walls. But no matter what you decide, try to choose tiles that are complementary to each other to give the room a more pleasant look.

While choosing the tiles you need to consider the texture of the tiles and if they are slippery or not. Tiles for the floor are made of a slip-resistant surface to prevent any injuries, which isn’t really needed for the walls. 

The tiles on the floor are also more prone to trapping dirt or becoming stained unlike the ones on the wall, so when making this decision keep this in mind and choose tiles that can be easily cleaned for practical reasons. Also, the bathroom has high levels of humidity so make sure the tiles can be exposed to water. Materials like porcelain and ceramic are good options for wall tiles.

Ultimately, while matching tiles can give the bathroom a seamless look, they don’t need to match. 

How to Choose Grout Color for Bathroom Tile?

Just like the color of the tiles, the grout color is also responsible for the overall look and feel of the room. But what color is the right one? Here are some very useful tips on how to choose grout color for bathroom tile.

The grout color doesn’t always have to match the tile color. Matching colors lead to a more cohesive look, but different colors add definition to the tiles and give the room a more dramatic effect.

Matching colors are great if you want the tiles to stand out more if they are very patterned and highly pigmented. Contrasting colors direct attention to the overall layout of the tiles. Dark grout can more easily hide typical stains, unlike lighter colors that need extra upkeep.

Make sure to match the grout with the accenting colors in the tiles or at least use a darker shade if your purpose is to point out some of the colors in the tiles. And if you don’t have any idea what to do and you are not a big fan of white then it is always safe to choose a neutral color like gray, beige, bold blue, or cream.

Look Good & Easy to Maintain: How to Choose Bathroom Tiles that Fit the Description?

If you are looking for tiles that are easy to clean then here are some tips and signs you should be on the lookout for while choosing bathroom tile.

  • Texture– Rough surfaced tiles can easily trap dirt. If you are not up for regular cleaning your tiles avoid these sorts of tiles.
  • Color– light colors accent the dirt and grime, unlike dark tiles which can easily hide it, but this doesn’t apply to the color of the grout. Dark-colored grout can more easily face or become discolored. 
  • Materials– some tiles are made out of materials that are not resistant to staining and moisture. If you want to avoid this then stay away from marble, limestone, travertine, wood-look tiles, and cork.
  • Grout– unsealed grout can absorb moisture and stains and can more easily become discolored and hard to clean.

But even if you follow all of these tips and choose tiles that are stain resistant and easy to clean, accidents can happen. Also, cleaning your tiles can be a time-consuming job not to mention that you will have to buy the right products so that you won’t damage the tiles. This is why having a professional tile cleaning company do regular maintenance is important. With the help of professionals, tile cleaning has never been easier. We at Steamy Concepts are at your service for all of your cleaning needs.

Bathroom Tiling: Final Words

There is no right answer on how to choose bathroom tiles. The design and style you choose for your bathroom tiles all depend on your preference and personal style. But before making the final decision read over the tips on how to choose bathroom tiles and consider them. 

The most important thing you need to remember in making this decision is maintenance. For those of you who have enormous or several bathrooms cleaning them is surely a nightmare even without the extra attention to the tiles. Calling a professional team on occasion to check things out won’t hurt.  

Frequently Asked Questions About Choosing Bathroom Tile

How do I choose the right bathroom tile?

To choose the right bathroom tiles you should take a couple of factors into consideration like room size, natural lighting, durability, and level of maintenance. Follow our tips to make the right decision.

What color tile is best for the bathroom?

While choosing a tile color it all depends on your personal preference. Natural colors are most popular and are used for a calmer look while bold colors give the room a more dramatic appearance. Light-colored tiles are used in smaller spaces while darker for bigger spaces. To make the right decision, consider the style of the rest of your home.

Is it better to use small or large tiles in a small bathroom?

In a small space it is best to use small tiles that give the room a larger appearance. Large tiles tighten the space, but if the room is big then large tiles can make it look more luxurious.

How To Avoid Dryer Vent Clogs

Do you ever wonder why your laundry takes longer to dry than usual? Or why the heat coming from it isn’t as strong as it used to be? If so, you may be dealing with a clogged dryer vent. Clogged dryer vents can be a major problem, as they can cause fires and other dangerous conditions in your home. In this article, we’ll discuss how to avoid dryer vent clogs and keep your home safe from harm.

Dryer vents are essential for keeping your clothes and appliances safe from lint buildup, which is a leading cause of fires in homes. Over time, lint can accumulate in the vent and restrict airflow, leading to decreased dryer performance, increased energy costs, and even a potential fire hazard. Fortunately, there are several steps you can take to ensure that your dryer vent remains clear.

The first step is to make sure that you regularly clean out the lint trap on your dryer. This should be done after each use and helps prevent lint buildup in the vent itself. Additionally, consider investing in an annual professional dryer vent cleaning by a qualified HVAC technician. This will help reduce the risk of fire or other hazards caused by clogged vents or ducts. Finally, make sure that any repairs or replacements needed for your dryer are done promptly by a qualified appliance repair technician. Following these steps will help ensure that your home stays safe from harm due to clogged vents or ducts.

General Tips For Preventing Dryer Vent Clogs

Maintaining a clean dryer vent is essential to preventing dryer vent clogs and is an important part of home maintenance. Fortunately, there are some simple tips that homeowners can follow to avoid dryer vent clogs and keep their dryer vents working correctly.

First, it’s important to regularly inspect the outside of your dryer vent for any blockages or debris. This includes clearing away any leaves, twigs, or dirt that can accumulate around the outside of the vent and potentially cause a clog. If you notice lint buildup on the sides of the vent pipe or within the machine itself, use a vacuum cleaner hose attachment to remove it.

Finally, make sure you’re using your dryer correctly. Avoid drying heavy items such as towels, jeans, and sheets together as this will cause more lint to be produced and increase the risk of a clog forming. You should also clean out the lint filter after every load of clothes and make sure not to overload your machine as this can lead to increased moisture in your laundry room which could lead to a clog forming in your dryer vent.

By following these tips and regularly inspecting both inside and outside of your dryer vent for potential blockages or debris, you can ensure that you’re doing all you can to avoid dryer vent clogs and keep your machine running smoothly.

Clean The Lint Screen After Each Load

It’s no secret that nothing is more infuriating than when your dryer vent clogs up. It’s a real bummer of a situation, and one that seems to happen way too often! But, luckily, there are some easy preventative steps you can take to avoid dryer vent clogs. One of the best ways to do this is by cleaning the lint screen after each load.

Cleaning the lint screen is not only an effective way to keep your dryer running smoothly and safely, but it’s also super simple. All you need to do is take out the lint screen after each load and give it a good shake over the trash can before putting it back in place. This will get rid of all the extra lint buildup that would otherwise linger in the vent and cause clogs or worse—a potential fire hazard!

Even if it may seem like a small task, taking just a few seconds to clean out your lint screen every time you run a load through the dryer can make a huge difference in keeping your vents clear. Doing so means less time dealing with clogs and more time enjoying fresh-smelling clothes without any hassle!

Schedule Regular Dryer Maintenance

Just as you were wondering how to avoid dryer vent clogs, the answer is simple: Schedule regular dryer maintenance. Wouldn’t it be ironic if your dryer caused a fire just after you thought of the question? It’s not something to joke about though. Regular maintenance can help prevent an unexpected disaster.

The first step to avoiding dryer vent clogs is scheduling regular service for your machine. This way, you can make sure that your clothes are getting completely dried, and avoid any potential danger from lint buildup in the exhaust ducts.

Having a professional come and inspect your machine every year or two will give you peace of mind that everything is working properly and safely. The technician will also likely clean the lint screen after each load and check for any other issues that could lead to a clog or even a fire hazard. So don’t wait – schedule regular dryer vent cleaning in Tucson today!

Check Your Dryer Vent Outlet Regularly

Many of us take our dryers for granted, but as with any appliance, regular maintenance is essential to keep them running in top condition. While it can be tempting to overlook the importance of checking your dryer vent outlet regularly, this critical step helps you avoid costly repair bills and potentially dangerous clogs.

It’s understandable that some people might think that regularly checking their dryer vent outlet is too time consuming or not really necessary – after all, if the clothes are drying it must be working right? But neglecting to check the vent outlet could actually end up costing you more in the long run. Clogged vents can cause excessive heat buildup in the dryer which can lead to fires or other serious damage.

So while it may feel like an extra hassle at times, taking a few minutes every month to inspect your dryer vent outlet will help ensure that your dryer is operating safely and efficiently. This simple task can save you time and money while helping you avoid those dreaded clogs.

Make Sure The Exhaust Vent Is Not Blocked

It’s easy to take our dryer vents for granted, but clogged or blocked vents can be a major cause of household fires. Could it be that the key to preventing these hazards lies in making sure the exhaust vent is not blocked? Let’s investigate this theory.

If your dryer vent is blocked, the air and hot lint will have nowhere to go, leading to fire hazards. Clothes may also take longer to dry, increasing energy costs. To make sure your vent isn’t blocked, you should regularly inspect both the inside and outside of the vent. If possible, remove any debris that may have accumulated around it. Also check that no objects are blocking airflow from inside the dryer itself – this could include items like clothes or lint traps.

Regularly inspecting your exhaust vent is an important part of protecting your home from fires caused by clogged dryers. Taking proactive steps such as removing blockages and ensuring good airflow will help keep your family safe and save money in the long run. So don’t forget about this important task!

Remove Lint Buildup In The Dryer Vent

Removing lint buildup in the dryer vent is a key part of preventing clogs. Lint build-up can be caused by a variety of factors, such as low airflow due to a blocked vent or too-long exhaust hoses. It’s important to regularly check for lint accumulation in the vent and clean it out when necessary. This can be done by either removing the vent from the wall and cleaning it manually or using a vacuum attachment to suck up any debris.

Cleaning your dryer vent also helps with efficiency and safety. Clogged vents restrict airflow, reducing drying times and causing clothes to become overly hot due to inadequate cooling. Excess heat buildup can even lead to fires if not addressed quickly. To ensure proper ventilation and reduce fire risk, lint should be removed on a regular basis, at least once every two months depending on usage levels.

Regularly inspecting and cleaning your dryer vent will keep it running well and help ensure that it remains clog-free. Simple preventative maintenance like this will go a long way towards keeping your home safe while saving money on energy bills. Taking the time to care for your dryer vent will pay off in the long run!

Check The Exhaust Vent Pipe For Clogs

Maintaining a clean dryer vent is essential for preventing fires and reducing energy bills. While regularly removing lint buildup can help, it’s also important to be proactive in checking the exhaust vent pipe for clogs. Here’s how you can do this.

Start by unplugging the dryer from the power outlet and remove the hose that connects the back of your dryer to the wall. Carefully inspect the pipe for any signs of blockages like dust or debris. If you notice any blockages, it’s best to use a vacuum cleaner or air compressor to clear them out. Make sure to wear protective gear like gloves and safety glasses when doing this.

Once you’ve cleared away any debris, reattach the hose and plug your dryer back in. It’s worth checking the exhaust vent pipe on a regular basis as part of your home maintenance routine, especially if you have pets that shed fur often. Doing so will help keep your dryer running smoothly and efficiently, while protecting your family from potential fire hazards.

Install A Dryer Vent Alarm

Many homeowners worry that installing a dryer vent alarm could be costly and difficult. However, this doesn’t have to be the case. In fact, a dryer vent alarm can be a cost-effective way to prevent costly repairs and even more expensive home insurance claims due to water damage from a clogged dryer vent.

A dryer vent alarm is designed to detect when airflow is blocked in the exhaust pipe. It will then sound an audible alert, letting you know that there may be an issue with your dryer vent system. Additionally, many alarms are equipped with wireless capabilities allowing you to monitor your system remotely from your smartphone or other device.

Installing a dryer vent alarm is not only an easy way to help prevent clogs, but it also offers peace of mind knowing that you’ll get an alert if something does go wrong. Plus, most models come with easy-to-follow instructions for installing and monitoring the system. You can feel confident that by taking this simple step, you’re helping protect your home from potential water damage caused by a clogged dryer vent.

Clean The Exhaust Vent Pipe Regularly

Regular cleaning of the exhaust vent pipe is an effective way to avoid dryer vent clogs. To do this, you should inspect the outside vent cover and remove any lint build-up that may be blocking the air flow. If you’re unable to access the vent cover, you can call a professional who can help with this task.

It’s also important to clean the interior of your dryer and its ducts at least once a year. This can be done by unplugging your dryer and vacuuming out any lint or debris that has built up inside the machine. Additionally, check for any cracks or tears in your dryer hose and replace them if necessary.

Taking these steps regularly will help ensure that your dryer runs safely and efficiently and will minimize the risk of a potential fire hazard caused by clogged vents. Furthermore, regular maintenance will also extend the life of your appliance, saving you time and money on costly repairs down the road.

Consider Installing A Dryer Air Filter

The dryer, like any other machine, needs maintenance to avoid clogs and other problems. Taking preventative measures can prove invaluable in keeping your dryer running smoothly – and one of the best solutions is to consider installing a dryer air filter.

This simple addition can save you a lot of future headaches. A dryer filter catches lint that would otherwise escape through the exhaust vent pipe, preventing it from causing clogs inside the pipe or elsewhere in the machine. As an added bonus, this filter also helps reduce energy use as it traps lint which can otherwise block airflow and reduce the efficiency of your machine.

Installing a dryer air filter is something worth considering if you want to keep your dryer free of clogs. Not only does it help prevent future issues, but it also improves energy efficiency and helps keep those pesky lint particles away from your clothes. It’s a small investment that could make a big difference for the long-term health of your machine!

Use High-Efficiency Dryer Models

Irony abounds when we consider that one of the ways to avoid dryer vent clogs is by using high-efficiency dryer models. It’s almost as if the very appliances that are meant to make our lives easier, are actually the culprits behind these pesky problems.

High-efficiency dryers may be more expensive than their conventional counterparts but they come with several advantages. For starters, they use significantly less energy and help reduce your utility bills. Furthermore, because they don’t need as much air circulation for cooling and drying, they create fewer lint particles which can contribute to clogged vents.

Though it may cost more upfront, opting for a high-efficiency model could save you time, money and hassle in the long run – not to mention ensure your laundry gets done without a hitch! So why not go for it?

Don’t Overload The Dryer

When it comes to preventing a dryer vent clog, one of the best steps you can take is to avoid overloading the machine. This means not stuffing too much into the dryer at once, since too much clothing can lead to lint getting stuck in the exhaust pipe and creating a blockage. Instead, make sure all items are evenly distributed in the drum, allowing for proper circulation of air.

Additionally, try to avoid drying items that are made from heavy materials such as terry cloth towels; these types of materials tend to create more lint and may lead to clogs sooner than other fabrics. If you find your dryer vent is already blocked with lint or another material, don’t attempt to clear it yourself – call a professional who has the right tools and experience to do the job properly.

To sum up, avoiding an overloaded dryer and being mindful of what types of fabrics you put in it are key steps in preventing dryer vent clogs. Taking these precautionary measures will help ensure your machine runs smoothly and efficiently for years to come.

Use The Right Type Of Vent Pipe

We all know the importance of avoiding dryer vent clogs, but how can we make sure it happens? The first step is to not overload the dryer, but what comes next? While there’s no one-size-fits-all approach to tackling this problem, using the right type of vent pipe is essential.

When it comes to choosing a vent pipe for your dryer, there are several important factors to consider. For starters, it needs to be made of a durable material that won’t corrode or break down over time. It should also be properly insulated and properly vented so that air can flow freely through the pipe. Lastly, it should be installed correctly so that lint doesn’t accumulate in the pipe and cause clogs.

Choosing the right vent pipe for your dryer will go a long way towards preventing clogs. Taking the time to do your research and pick out a quality product will pay off in the long run. With some effort and attention to detail, you can ensure that your dryer runs efficiently for years to come and avoid costly clogs and repairs.

Replace Your Dryer Vent Pipe When Necessary

The dryer vent pipe, like a beacon of safety, stands guard between you and a potential fire hazard. This pipe is your lifeline when it comes to preventing dangerous clogs caused by improper lint removal. But over time, even this guardian may need to be replaced if it begins to deteriorate or doesn’t fit the model of your dryer correctly.

It’s important to check on the condition of your dryer vent pipe periodically. If it’s made from plastic or thin metal, such as aluminum foil, replace it immediately with a sturdier material such as rigid metal ducts that are designed for dryer vents. Also ensure that all joints and connections are securely fastened and sealed with either foil tape or mastic sealant – this will help prevent heated air from escaping which can lead to clogging.

In addition to regular maintenance, make sure you’re using the right type of vent hose for your specific dryer model. Depending on the manufacturer and type of machine, you may need a shorter hose in order to keep lint buildup at bay and reduce the risk of clog formation. Taking these precautions can help ensure that your dryer stays running safely and efficiently while keeping hazardous lint build-up away from your home.

Keep The Outside Dryer Vent Flap Clear

It’s important to ensure that the outside dryer vent flap is kept clear. This will help prevent lint and debris from getting sucked into the pipe, thus avoiding clogs. To keep the outside vent flap clear, it’s important to make sure that any plants or shrubs are not growing too close to the dryer vent pipe. It’s also a good idea to use a leaf blower or vacuum every few months to remove any lint or debris that has built up on or near the dryer vent pipe.

In addition, you may want to consider using a dryer lint brush to clean out the inside of the pipe once in a while. This will help remove lint build-up in areas that are hard to reach with a blower or vacuum. You can also use a damp cloth or rag to wipe down the inside of the pipe in order to help keep it free from lint buildup.

Finally, if your Tucson home has an older dryer vent system, it might be time for an upgrade. Newer models are designed with features such as backflow prevention which helps keep air flowing freely through the vent and prevents clogs from forming. Investing in one of these systems can be well worth it if you want to avoid costly repairs due to clogged vents down the line.

Final Words: How To Avoid Dryer Vent Clogs

In conclusion, dryer vent clogs can be avoided with proper maintenance and care of your dryer. Following the tips above will help to ensure that your dryer runs efficiently and safely without the risk of a clog. A little bit of effort and attention to detail goes a long way in preventing lint build-up and other potential problems. As the saying goes, an ounce of prevention is worth a pound of cure – so it’s worth taking the time now to inspect your dryer vent system for any signs of blockage or damage. Taking these proactive steps will save you money and frustration in the long run! Alliteration can be used to emphasize this point: Preventative measures provide powerful protection from pesky problems.

The Dangers Of An Unclean Dryer Vent In Tucson

Something most people don’t think about is the dangers of an unclean dryer vent in their Tucson home. Let’s break down what makes this so dangers and how to avoid it. In Tucson, Arizona, the hot, dry climate makes it especially important to keep your dryer vents clean. Unfortunately, many people don’t know the dangers of an unclean dryer vent, and they could be putting their home and family at risk.

If lint and debris build up in your dryer vent, it can create a fire hazard, as well as cause your dryer to work inefficiently. Not only can this cost you money in the long run, but it can also put your home and family in danger.

In this article, we’ll look at the dangers of an unclean dryer vent in Tucson, and discuss the steps you can take to ensure your dryer vent is clean and safe. We’ll also explore the anachronistic importance of having your vents professionally cleaned to avoid any potential disaster.

What Is A Dryer Vent and What Are the Dangers of Leaving it Unclean?

If you live in Tucson, Arizona, you know how hot it can get. With temperatures reaching over 100 degrees Fahrenheit in the summer months, it’s important to stay cool and comfortable. But, have you ever considered the danger of an unclean dryer vent? It may not seem like a big deal at first, but it can be a major danger to your health and safety.

A dryer vent is the pathway that your dryer uses to release the heat and moisture that it generates during the drying process. As your clothes dry, the heat and moisture escape through this vent into the outside atmosphere. Over time, the vent can become clogged with lint and other debris, blocking the air from escaping. This can be a major cause of fires, as the heat and moisture build up and create a hazardous environment.

It’s important to understand that a blocked dryer vent is like having a ticking time bomb in your home. Without regular cleaning and maintenance, the vent can become a ticking time bomb of heat and moisture, waiting to explode into a fire. Just like a fire needs fuel and oxygen to ignite, the lint and debris that accumulates in the vent can provide the fuel and the air trapped in the vent can provide the oxygen.

The best way to protect yourself and your family from the dangers of an unclean dryer vent is to keep it clean and clear. Regularly inspect and clean the vent to make sure that it is free of lint and debris. Doing this will help to ensure that your home is safe and your dryer is working as efficiently as possible.

Why Is Cleaning A Dryer Vent Necessary?

Cleaning a dryer vent is an important part of homeownership in Tucson. As the saying goes, “An ounce of prevention is worth a pound of cure”, and that’s certainly true with dryer vents. If you neglect to clean your vent, you could be putting your home – and your family – at risk.

A buildup of lint in your dryer vent can lead to a number of dangerous issues. Not only can it restrict airflow, which can cause your dryer to overheat, it can also be a fire hazard. The lint is highly flammable, and it can easily catch fire if it’s not removed. Additionally, a clogged dryer vent can cause carbon monoxide to enter your home, putting your family in danger.

Cleaning a dryer vent is an easy process, and the benefits are great. Not only will it help to keep your family safe, but it can also help your dryer to run more efficiently. This can save you money on your energy bill and extend the lifespan of your appliance.

It’s important to have dryer vent cleaning service in Tucson on a regular basis, at least once a year. If you live in a dusty climate, such as Tucson, you may need to clean your vent more often. This will help to keep your dryer running smoothly and your home safe. Don’t wait until it’s too late – take the time to clean your dryer vent today.

What Are The Risks Of An Unclean Dryer Vent In Tucson?

The buildup of lint and debris in your dryer vent is a serious issue that should not be taken lightly. In Tucson, the risks of an unclean dryer vent are even greater due to the extreme temperature shifts that are common in the area. Without regular maintenance and cleaning, the buildup of lint and debris can become a fire hazard.

When heated for drying clothes, lint and debris can easily ignite, creating a rapid and destructive fire. In addition, an unclean dryer vent can block air flow, making your dryer run inefficiently and potentially overheat. This can lead to costly repairs and higher energy bills.

In Tucson, the hot and dry climate can also make an unclean dryer vent even more dangerous. The lint and debris inside the vent can act as kindling during the hot summer months and create a fire hazard.

Finally, a clogged dryer vent can cause carbon monoxide poisoning, which is especially dangerous in Tucson due to the lack of humidity. Carbon monoxide, a colorless and odorless gas, is released when the dryer is unable to effectively ventilate. This gas can cause serious health issues, including dizziness, headaches, and even death.

For all of these reasons, it is essential to keep your dryer vent clean and free of lint and debris. Regular maintenance and cleaning will help to ensure that your dryer is running safely and efficiently.

TIP: To prevent any potential risks, make sure to clean your dryer vent at least once a year, and more often if you do a lot of laundry. This simple task can help to keep your family safe and healthy, and your dryer running smoothly.

How Does Lint Build-Up Occur In A Dryer Vent?

When it comes to the risks of an unclean dryer vent in Tucson, one of the most common causes of lint build-up is neglect. In a city with a dry climate, it’s easy to forget to pay attention to the maintenance of your dryer vents. Unfortunately, this can be disastrous if you don’t take the time to clean the lint build-up out of your vents.

Take the case of the Johnson family. They lived in Tucson for over seven years, but they never paid attention to their dryer vents. As a result, the lint build-up over the years caused the dryer to overheat and eventually burst into flames. The fire spread throughout the house, leaving the family devastated.

Lint build-up occurs when the air from your dryer escapes through the vents and mixes with the lint, dust, and pet hair that accumulate in the dryer’s lint trap. This build-up of lint can become so thick that it blocks the dryer vent and prevents the air from escaping. This can cause your dryer to overheat, leading to fires or other safety hazards.

It’s important to regularly inspect and clean your dryer vent to make sure the air can flow freely. This can be done by either hiring a professional to clean the vents or by doing it yourself. It’s also important to clean the lint trap after every load of laundry to help prevent lint build-up.

By taking the time to inspect and clean your dryer vent, you can help to ensure that your home is free from the dangers of an unclean dryer vent. Taking the time to inspect and clean your dryers vents can help to keep your family safe and your home free from the risks of lint build-up.

Signs You Need To Clean Your Dryer Vent

When it comes to keeping your dryer vent in Tucson clean, it’s important to look out for signs that it may be in need of a deep clean. Here are some indicators that your dryer vent could be clogged and need a good scrub:

* Poor Dryer Performance:

– Your clothes are taking much longer to dry than usual.

– Your dryer is running much hotter than normal.

– Clothes coming out of the dryer are excessively hot and/or damp.

* Visible Lint:

– You can see lint and/or dust in your dryer vent and/or lint trap.

– You can see a large buildup of lint on the outside of your dryer vent.

* Unusual Sounds:

– You can hear a whistling noise coming from your dryer vent.

– You can hear a rumbling or vibrating sound coming from your dryer.

– You can hear a rattling noise coming from the inside of your dryer.

If you notice any of these signs, then it’s important to clean your dryer vent as soon as possible. Not only will this help to keep your dryer running efficiently, but it can also help to prevent a potential fire hazard. Taking the time to clean your dryer vent can be a simple and effective way to protect yourself and your family.

The Dangers Of Carbon Monoxide Poisoning From An Unclean Dryer Vent

One of the most serious dangers of having an unclean dryer vent in Tucson is the risk of carbon monoxide poisoning. Carbon monoxide is an odorless and colorless gas that is produced when burning fuel such as gas or oil. When a dryer vent is clogged, it can trap the carbon monoxide and put your family at risk of exposure.

In Tucson, carbon monoxide poisoning can be particularly hazardous due to the city’s high temperatures. Carbon monoxide gas becomes more concentrated in hot weather, creating an even greater risk of exposure. Symptoms of carbon monoxide poisoning can include headaches, dizziness, confusion, nausea, and even death.

Having an unclean dryer vent can be like playing a game of Russian roulette with your family’s health. The longer the vent is left clogged, the greater the risk of exposure to dangerous gases. It’s important to be aware of the signs that you need to clean your dryer vent, and to take action as soon as possible to eliminate the risk.

Think of your dryer vent like a ticking time bomb. The longer it goes unchecked, the greater the risk of a dangerous explosion. Don’t let your vent become a ticking time bomb, and take the necessary steps to keep your family safe. Cleaning your dryer vent regularly is the best way to ensure that your family is safe from the dangers of carbon monoxide poisoning.

How To Prevent Lint Build-Up In Your Tucson Home’s Dryer Vent

Living in Tucson, lint build-up in your home’s dryer vent can be a real hazard. While it’s tempting to think that you can just ignore the problem and hope it goes away, the reality is that the longer you let lint build-up in your dryer vent, the greater the risk of carbon monoxide poisoning becomes.

Fortunately, there are several simple steps you can take to prevent lint build-up in your Tucson home’s dryer vent. First, make sure you clean the lint filter after every cycle. This will help to reduce the amount of lint that accumulates in the vent over time. You should also vacuum around the exterior of the dryer on a regular basis to remove any dust or debris that has accumulated.

Another way to reduce the build-up of lint in your dryer vent is to consider investing in a dryer vent cleaning kit. These kits typically include a brush that is designed to remove lint from the inside of the vent, as well as a vacuum attachment that can be used to suck out any lint that has accumulated on the outside of the vent.

Finally, it’s important to have your dryer vent professionally inspected on a regular basis. A qualified technician will be able to identify any potential fire hazards, as well as any areas where lint may be building up. This will help to ensure that your dryer vent remains safe and efficient.

While it may seem like a hassle to keep your dryer vent clean and lint-free, it’s an important step in preventing carbon monoxide poisoning in your Tucson home. By taking proactive steps to keep your dryer vent clean, you can help to keep your family safe from the dangers of an unclean dryer vent.

Tips For Cleaning Your Own Tucson Home’s Dryer Vent

If you’re a Tucson homeowner, you may have noticed that your dryer vent is starting to become filled with lint. Not only can this be dangerous for your dryer, but it can also be a fire hazard. Fortunately, taking the time to clean your dryer vent yourself is surprisingly easy, if you know what you’re doing. Here are a few tips to keep your dryer vent clean and lint-free.

The first step to cleaning your dryer vent is to unplug the dryer from the wall. This will ensure that you don’t get shocked during the cleaning process. After that, you’ll want to check the vent to see if there are any clogs. If you notice a clog, you can use a vacuum cleaner to remove it. If the clog is too tough for the vacuum, you can try using a long-handled brush to clear it out.

Once you’ve cleared the vent, you’ll want to locate the hose that runs from the dryer to the wall. This is usually located behind the dryer, and it’s important to make sure that it’s free from any blockages. If the hose is blocked, you’ll want to use a long flexible brush to clear it out.

Finally, you’ll want to make sure that you inspect the area around the vent for any lint build-up. It’s important to remove any lint that you can find, as it can be a fire hazard. Once you’ve done that, you’ll be all set!

By taking the time to clean your Tucson home’s dryer vent, you can help to reduce the risk of a fire. Not only is this a great way to keep your family safe, but it’s also a great way to make sure that your dryer is running efficiently. So the next time you notice a clog in your dryer vent, you’ll know exactly what to do.

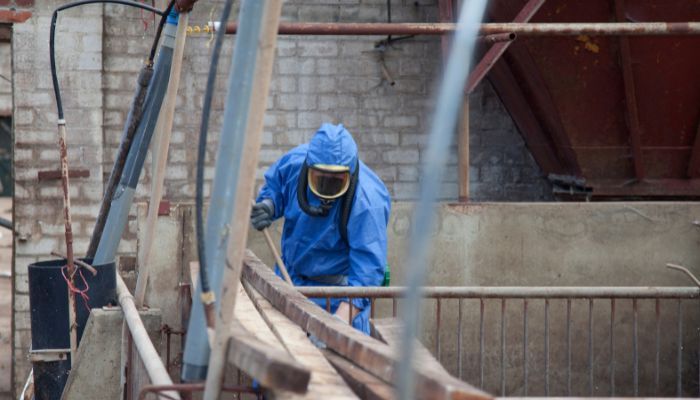
When Should You Hire A Professional For Your Tucson Home’s Dryer Vent Cleaning?

When it comes to your Tucson home’s dryer vent, it’s important to be aware of the dangers of an unclean vent. To illustrate the importance of professional cleaning, let’s imagine a house fire as an allegory for an unclean dryer vent.

It starts off as a small spark, almost unnoticeable, but left unchecked it can quickly grow into a raging inferno. Similarly, small lint buildups in your dryer vent can quickly become a major fire hazard if not taken care of. Just like a fire, an unclean dryer vent can cause major damage to your home, and even lead to injury or death.

To prevent this from happening, it’s best to hire a professional to inspect and clean your Tucson home’s dryer vent. Professionals will be able to identify potential fire hazards and remove any lint buildup that could cause a fire. They will also be able to suggest ways to improve the efficiency of your dryer vent, such as adding extra ventilation or replacing old ducts.

Overall, it’s important to take the time to inspect and clean your dryer vent regularly. If you ever feel unsure of what to do, it’s best to hire a professional to ensure the safety of your home. By taking the time to invest in a professional dryer vent cleaning in Tucson, you’ll be able to rest easy knowing that your Tucson home is safe from the dangers of an unclean dryer vent.

Common Causes Of Blockages In The Dryer Vents Of Tucson Homes

When it comes to the safety of your Tucson home, it’s important to be aware of the potential dangers of an unclean dryer vent. One interesting statistic to consider is that nearly 14,000 home fires are caused by clogged dryer vents in the United States each year. That’s why it’s so important to take steps to clean and maintain your dryer vent on a regular basis.

Common causes of blockages in the dryer vents of Tucson homes vary, but some of the most common culprits are lint, dust, and debris. Over time, these small particles can accumulate in the vent, resulting in a blockage. Additionally, animals such as birds, rodents, and insects can sometimes build nests in the vents, resulting in a dangerous and potentially hazardous situation.

It’s also important to note that dryer vents made of plastic or aluminum are more prone to blockages than those made of metal. Plastic and aluminum are not as durable and can easily become clogged with lint, dust, and other small particles. In some cases, dryer vents may even become blocked due to faulty design or installation.

By understanding the common causes of blockages in the dryer vents of Tucson homes, you can take steps to prevent them. Cleaning your dryer vent on a regular basis is the best way to keep it free from blockages and other potential hazards. Additionally, you may want to consider hiring a professional for your Tucson home’s dryer vent cleaning, as they will be able to identify any potential issues and take the necessary steps to ensure the safety of your home.

The Benefits Of Regularly Cleaning And Inspecting Your Tucson Home’s Dryer Vents

When it comes to living in Tucson, it pays to be aware of the danger of an unclean dryer vent. Not only is it a potential fire hazard, but it can also lead to blockages that can significantly reduce the efficiency of your dryer. Thankfully, regularly cleaning and inspecting your dryer vents can help to ensure that these issues don’t arise.

The benefits of keeping your dryer vents clean and clear are manifold. Not only will it drastically reduce the risk of fire, but it will also help to keep your energy bills low. Clogged vents can cause your dryer to work harder than it needs to, which in turn can lead to a higher energy bill. Keeping your dryer vents cleaned and inspected can help to keep your energy bills in check.

Additionally, keeping your dryer vents clean and clear can help to reduce wear and tear on the appliance itself. Clogged vents can cause the dryer to overheat and can cause its internal components to become damaged over time. By taking the time to regularly clean and inspect your dryer vents, you can keep your dryer running smoothly and prolong its lifespan.

When it comes to protecting your Tucson home from the dangers of an unclean dryer vent, prevention is the best medicine. Taking the time to regularly clean and inspect your dryer vents can help to keep your home safe, your energy bills low, and your dryer running smoothly. Consider it an investment in the future of your home, for the assurance of a safer and more efficient home today.

How Can You Tell If Your Tucson Home’s Dryer Vents Are Not Properly Installed Or Maintained?

When it comes to dryer vents in Tucson, the stakes are high. Without proper installation and maintenance, these vents can become clogged with lint and debris, leading to an increased risk of fire and other hazardous issues. Knowing how to spot the signs of improper installation or maintenance is key to keeping your family and home safe.

If you notice any of the following signs, it could be an indication that your dryer vents are not properly installed or maintained:

  1. Unusually long drying times. If your laundry takes longer than usual to dry, it could be due to a clogged ventilation system.
  2. Unpleasant smell. If you start to notice a musty smell when running your dryer, it could be due to lint buildup in the vent.
  3. Unusual noises. Rattling or vibrating noises when running your dryer could be a sign of an improperly installed vent.
  4. Excessive lint buildup around the dryer. Excessive lint accumulation around the dryer, or in the room where the dryer is located, is a telltale sign that the vents are not properly installed or maintained.

If you notice any of these signs, it’s important to call a professional to inspect and clean your dryer vents as soon as possible. Taking the time to ensure that your dryer vents are properly installed and maintained can save you from a hazardous situation and give you peace of mind. Knowing the warning signs is the first step in keeping your Tucson home safe and secure.

What Are The Costs Associated With Professional Cleaning And Maintenance Of Your Tucson Home’s Dryer Vents?

As a Tucson homeowner, you may be wondering how much it will cost you to have your dryer vents professionally cleaned and maintained. The answer depends on a variety of factors, such as the type of system you have, the size of the vents, the extent of the blockage, and the accessibility of the area. Generally, however, the cost of professional dryer vent cleaning and maintenance is relatively affordable.

Professional dryer vent cleaning and maintenance typically involves removing any lint or debris that has accumulated in the vent, as well as inspecting and cleaning the vent hood, vent cover, and any other components. If any damage or blockage is found, the technician may need to repair or replace the affected parts. Additionally, they may need to access hard-to-reach areas, such as behind walls or ceilings, which may require additional time and effort.

The overall cost will vary depending on the complexity of the job, but it is usually worth the investment. Not only will it help to prevent a fire, but it can also reduce energy costs and improve the efficiency of your dryer. So, if you’re asking yourself, “What are the costs associated with professional cleaning and maintenance of my Tucson home’s dryer vents?”, the answer is that it’s an investment worth making.

When Should You Call Emergency Services For An Unclean Or Clogged Dryer Vent In Tucson?

If you live in Tucson, there are several instances where you should call emergency services for an unclean or clogged dryer vent.

Here are 4 signs that indicate you should call for help:

1) Excessive heat or smoke coming from the dryer vent.

2) An unpleasant burning smell coming from the dryer vent.

3) A buildup of lint in the dryer vent.

4) Your dryer is taking longer than normal to dry clothes.

If you experience any of these signs, it’s important to call for professional help as soon as possible. A clogged or unclean dryer vent can be a serious safety hazard, and can lead to property damage or even a fire. Don’t take the risk – if you think you may have an unclean or clogged dryer vent, call emergency services right away.

What Other Preventative Measures Can Be Taken To Ensure Unclogged And Clean Dryers Vents In Your Home In Tucson?

When it comes to keeping your dryer vent clean in Tucson, prevention is key. Taking the right steps will help to ensure that your dryer vent remains unclogged and clean, and that you don’t have to call emergency services.

The first step is to make sure that your lint trap is cleaned regularly. This simple preventative measure will help to reduce the amount of lint and debris that builds up in the dryer vent. It’s also important to check the outside of the dryer vent for any clogs or debris. If there’s any blockage, you can use a vacuum cleaner to clear it away.

You should also make sure to inspect the dryer vent for any signs of wear and tear. If you spot any holes, cracks, or other damage, you’ll need to contact a dryer vent professional to have it repaired. A clogged dryer vent can become a fire hazard, so it’s best to be proactive and have it fixed as soon as possible.

Finally, you should have your dryer vent inspected and cleaned professionally at least once a year. This will help to ensure that any clogs are removed, and that the vent is in proper working order.

Taking the right preventative measures can help to save you time, money, and potential danger. Keeping your dryer vent clean and unclogged in Tucson is the key to a safe and efficient laundry experience. With the right steps, you can make sure that your dryer vent remains in top condition for years to come.

Understanding The Dangers of an Unclean Dryer Vent in Tucson

The safety of your home in Tucson is of the utmost importance, and one of the most overlooked areas is the dryer vent. Cleaning the dryer vent is one of the best ways to avoid the dangers of an unclean dryer vent, such as fire hazards, carbon monoxide poisoning, and inefficient drying.

It is important to inspect and clean your dryer vent at least once a year to ensure the safety of your home. Regular inspections can help you identify blocked vents, lint buildup, and other problems that can be easily avoided with regular maintenance.

By regularly checking and cleaning your dryer vent, you can ensure that your dryer is working efficiently and safely. Taking the time to inspect and clean your dryer vent can save you time and money in the long run, and help keep your home safe and comfortable. The best option would be to call a company like Steamy Concepts for a professional dryer vent cleaning in Tucson

Getting Rid of the Asbestos in Your Home: Why It’s Important

On a global scale, nearly 90,000 people lose their lives due to asbestos-related diseases. In fact, asbestos is considered the leading cause of death in the world related to work. Asbestos refers to several components like crocidolite, amosite, chrysotile, tremolite, anthophyllite, and actinolite. These are all naturally-found minerals that pose significant risks to human health.

Asbestos exposure is more common than people think. Namely, asbestos exposure can happen in schools, at work, at home, or in the military. Other than the person exposed to asbestos, their immediate surroundings are also at risk of second-hand exposure, making asbestos much more dangerous.

Household products, older buildings, insulations, and roofs can be abundant in asbestos, which further stresses the need for removing asbestos sooner rather than later. Let’s have a closer look at the dangers of asbestos and what you can do to get rid of it safely.

The Dangers of Asbestos & Why You Should Remove It?

As we mentioned, asbestos takes nearly 100,000 lives across the world. Americans that are part of the construction industry, the mining industry, and all related areas develop a greater risk of suffering from an asbestos-related disease.

One of the particular traits of asbestos-caused diseases is that the symptoms might not be immediately visible but rather take time to develop. Asbestos exposure most commonly results in cancer. Lung cancer, ovarian cancer, cancer of the larynx, and mesothelioma are the most common types of cancers caused by asbestos.

The professional occupations that are at the greatest risk of asbestos exposure include the following examples:

  • Miners that worked in asbestos mines were, without a doubt, at the highest risk of developing severe asbestos-related diseases. Even though asbestos mining ended in 2002, miners still feel the consequences of asbestos exposure;
  • Farmers and other agricultural workers can become exposed to asbestos through various farm equipment and gear. Farmers that have worked on asbestos-abundant soil have suffered from a high level of asbestos exposure;
  • Blacksmiths have been known to use aprons, covers, and welding gear containing asbestos;
  • Auto mechanics might get in touch with asbestos by either performing brake changes or other brake-related services. This type of asbestos exposure can go from low to moderate;
  • Cement plant workers risk exposure if they make asbestos cement blocks or other asbestos cement-related products. This type of exposure ranges from moderate to high;
  • Workers in chemical plants, like technicians, engineers, and maintenance workers, can be exposed to asbestos exposure ranging from low to moderate if around asbestos lab countertops, asbestos laboratory supplies, asbestos ovens, and asbestos insulation;
  • Carpenters can suffer from a high level of asbestos exposure if handling asbestos products and working near construction materials containing asbestos, especially insulation materials. Speaking of insulation, it poses the highest risk of asbestos exposure;
  • HVAC mechanics that have installed, repaired, or disposed of asbestos are at high risk of exposure. Asbestos-comprising materials and asbestos ductwork are known as the ultimate enemy of HVAC workers, exposing them to a high level of asbestos concentration;
  • Linotype technicians were faced with a lot of asbestos present in old printing machines back in the day. Such machinery comprised asbestos insulation and a variety of other asbestos parts that put the lives of linotype technicians at low to moderate risk;
  • Electricians directly associated with handling asbestos products are in factual exposure to asbestos. They suffer from a relatively low level of exposure that can easily go to a modest exposure level, depending on the products they use;
  • Workers at oil refineries in charge of packing materials and pipe wrap insulation were at risk of asbestos exposure. Namely, oil refineries include asbestos gaskets, valves, and pumps, which are typical exposure sources;
  • Workers at paper mills, like maintenance workers and machinists, are directly involved with handling asbestos-made products. Packing fabrics, gaskets, and insulation materials are part of paper mills that put employees at risk of low to moderate asbestos exposure.

The grave consequences of asbestos exposure have urged Americans to research the matter more thoroughly. Moreover, they have taken all precautionary measures to ensure their home or work environment is free of this dangerous mineral. As a lot of homeowners probably know, asbestos can be found in more than one place around the house, such as:

  • Loose insulation made of vermiculite;
  • Vinyl floor tiles;
  • Ceiling tiles;
  • Bath panels;
  • Divider walls;
  • Textured coatings and so on.

The above examples refer to the house’s inside, but asbestos can be found on the exterior, as well, in:

  • Window panels;
  • Roofing felt;
  • Gutters and downpipes made of asbestos;
  • Asbestos cement roofs;
  • Siding shingles.

How to Remove Asbestos?

As dangerous as asbestos is, there are still ways how asbestos is removed from the premises, but we strongly suggest a professional does the removal. Improper asbestos handling can do more harm while removing it, which is why hiring professionals for the job is crucial.

Certified professionals will know how to remove asbestos as well as properly dispose of it. Moreover, the professional will proceed to decontaminate the space to eradicate lingering health hazards.

How to Safely Remove Asbestos?

As we mentioned, it’s highly recommended you choose a licensed professional to remove the asbestos from your home or workspace. If you hire someone that isn’t licensed and experienced in handling asbestos, you are at risk of contaminating the place even more.

If you are unsure how to safely remove asbestos, hire a professional who will abide by the legal requirement regarding handling asbestos, following the instruction of the OSHA.

As opposed to many asbestos-comprising materials, vinyl asbestos floors are considered safe, and many U.S. households have them. However, havoc might ensue once you decide to remove them. The typical design of older houses across the U.S. includes vinyl floors, and those vintage vinyl tiles contain asbestos. Upon removing the vinyl tiles, asbestos can create a cloud of toxic dust, which is why asbestos handlers wear protective masks.

Can You Remove Asbestos Yourself?

The answer to the question “Can you remove asbestos yourself?” is no. Once disturbed, asbestos creates toxic dust that enters the human body easily, causing lung cancer and asbestosis. This is one of the main reasons you should not remove asbestos tiles, shingles, insulation, and other items containing asbestos by yourself.

As we mentioned, asbestos is better left handled by professionals, any mishandling leads to grave health consequences.

Should You Remove Asbestos by Yourself?

To put it plainly, you should not be anywhere near asbestos! If you believe something in your house, outside of it, or at the workplace contains asbestos, do not touch it! Instead, find a company that does professional asbestos removal.

If you want to be of help, keep the item in question isolated and out of reach until the professionals arrive.

FAQs

Having a lot of questions about asbestos is entirely understandable, especially if you live in an older house that might contain asbestos-made elements. Let’s look at some of the most commonly asked questions about asbestos.

Can asbestos be washed off?

If you get asbestos on your clothes, you should know that you cannot wash it off that easily. If you attempt it, you might be directly exposing yourself to asbestos. In fact, typical washing machines are not intended to clean hazardous materials of clothes.

If you even try to wash off asbestos, it will easily become airborne and put everyone around at a great risk of health-threatening contamination.

Is asbestos OK if you leave it alone?

Even though asbestos is as dangerous as it gets, it won’t be efficient in causing harm if you don’t mess with it. Namely, you don’t have to remove asbestos if the items containing it aren’t damaged. For example, shingles that are in good condition, not broken or otherwise damaged, even if containing asbestos, can be safe to be around.

What happens if you breathe in asbestos once?

Yes, asbestos can be dangerous, even in the case of a one-time exposure. It is possible to develop asbestosis, or even mesothelioma, pleural effusions, and lung cancer after asbestos exposure, even in a single occurrence. If you are doubtful the exposure has been significant enough to cause asbestos particles to enter the insides of the body, ask for help immediately and explain the asbestos exposure in detail.

How do I clean my house after asbestos exposure?

Immediately dispose of debris and waste linked to asbestos swiftly and correctly. To be on the safe side, we strongly recommend contacting professional asbestos removal companies — they will know the correct procedure for ensuring the cleanliness of your house after asbestos exposure.

If you want to do it yourself, clean any dust and debris from all the horizontal areas like floors, window sills, and any decorative moldings. Use disposable wipes or wet rags to clean the surfaces. After you’ve cleaned them, use an atomizer bottle containing a mix of PVA glue and water in a 5:1 ratio, respectively. This is to ensure the pick up of any asbestos residue.

Removing Lead Paint from Your Home: How to Go About It?

Lead-based paint can be a serious health hazard, especially deteriorating paint. If you happen to find lead paint in your home, your initial instinct may be to remove it immediately. However, even though you may have lead paint in your home, there may still be no health risks. Additionally, you can be safe from contamination by enclosing any paint that is still in good condition and repainting. The real risk is when lead paint is flaking or otherwise decaying, which can result in the inhalation of lead dust or the ingestion of lead-based paint chips, which are very toxic.

If you wonder how to remove lead paint safely, there are a few ways to do so. Stay with us as we will further explain how to remove lead-based paint.

Why Should You Remove Lead Paint?

At one point, lead was a metal that was used in practically every industry. It was found anywhere from our plates to plumbing pipes and fuel. Most importantly, lead-based pigments have been used in paint pigment for hundreds of years. The usage of lead persisted well into the 1970s, and lead-based paint was used to paint practically every house constructed before 1950.

However, it was discovered that if you don’t take precautions when removing lead-based paint from a building’s interior or exterior, you could get lead poisoning, the consequences of which can be severe. Lead poisoning, if untreated, can harm the brain, cause anemia and kidney damage, and even be deadly to both kids and adults. Children are particularly susceptible, as while playing, they may ingest lead paint chips.

This is why it’s important to remove the lead paint or treat it accordingly to avoid any potential damage to your health.

How to Remove Lead Paint?

Encapsulation: The answer to how to remove lead paint most simply and least expensively is via encapsulation. It entails applying a specially formulated paint-like covering by sweeping or spreading it. This coating forms a waterproof seal and locks in lead-based paint. Opening and shutting your doors and windows can ultimately cause the coating to disappear.

Enclosure: By using this technique, the old surface is replaced with a fresh one, for instance, by installing fresh drywall or sheathing made from aluminum or acrylic.

Removal: Lead-based paints can be removed using different methods, like wire brushing or wet hand scraping using liquid removers for paint. If you choose wet sanding, you must use an electric sander with a high-efficiency particle air (HEPA) filtered vacuum.

Replacement: This approach entails removing the problematic elements and replacing them with new windows, doorways, furniture, and other surfaces.

Other ways to remove lead paint!

Using containment, protection, dust reduction, and cleanup strategies is a safe way to remove lead paint from your home. These are the same methods that the EPA advises specialists to use.

Containment: Enclose the space where you’ll be working with an air-tight barrier. You wouldn’t want dust to exit the work area and settle in other clean rooms.

Protection: Anybody removing lead paint on the job site must be wearing full safety equipment.

Dust regulation: When lead paint has been scraped, water misted plastic container helps to confine the dust.

Cleaning: A HEPA vacuum, which is normally found at a rental yard, is recommended to be used to clear up the work. Don’t use a vacuum in your house. Everyone who has been around the area should clean up and either wash or discard any protective equipment after the project is finished.

Can a Homeowner Remove Lead Paint?

The homeowner can remove lead pain by taking safety precautions at all times, like covering the hair and putting on overall and gloves. Also, wearing a respirator with a HEPA filter or a least an FFP3 dust mask is recommended.

Remove anything from the room before beginning to remove the paint, paying extra attention to soft furniture, drapes, and carpets. Avoid generating dirt or fumes as a general rule. To lessen the risk of breathing dust, use a chemical remover to attach the particles and dampen your working area.

Maintain good ventilation while working, and keep others out of the area. Don’t peel any paint that is still in good shape! To protect the lead paint, simply paint over it. As soon as you can, put the stripped paint in bags and tape them shut.

Can I Remove Lead Paint Myself?

You can remove lead pain by yourself if you follow the steps below.

Step 1: Completely clear the space: Take away all household goods, plumbing, and furniture from your operating space. By doing this, you won’t expose them to lead particles. Switch off all heating and ventilation, systems and shut all windows.

Step 2: Wear something protective: Wrap the entire floor, entrance, air ducts, stoves, and other surfaces with heavy plastic tarps. Make sure there are no holes in the plastic sheeting by taping it down with duct tape.

Step 3: Wear the appropriate safety gear: This is a crucial stage in the removal of lead paint properly. A half-face respirator with an authorized HEPA filter is among the necessary safety gear that you must wear. Baggy sweats, disposable overshoes, latex gloves, safety goggles, and a cap should all be worn.

Step 4: Water-spray the area: To reduce the possibility of tiny lead particles flying about, keep a bucket of warm water nearby, together with sponges or cloths, for mopping surfaces. Spray areas of cracked or flaking paint with a spray bottle containing water.

Step 5: Use a hand scraper to remove flaking paint: Wipe off any flaking or deteriorating paint. You are not required to remove all lead paint because you’ll subsequently paint over it using lead-free paint.

Step 6: Sand any rough areas smooth: Rinse the surface once more to make sure it is moist, and use a sanding cloth to smooth off any rough edges left by scraping. Once you’re finished, carefully sweep the area with a wet sponge to remove any lead-filled dust.

Step 7: Paint over the wall: You may paint over the wall using lead-free paint if the lead paint is in good shape and you’ve handled any peeling or deterioration.

Step 8: Completely vacuum your workspace using a different, approved HEPA vacuum: Even if it has a HEPA filter, avoid using a regular household vacuum to clean up your workspace because it could spread lead particles into the air.

Step 9: Gently remove and discard the plastic sheeting that served as protection: To collect any remaining lead particles that have not been vacuumed up, wrap the plastic covering inward. The sheets should then be rolled up and put in a rubbish bag.

Step 10: Clean the area: Wash the area with lead-filled particles carefully while using your protective gear. For this stage, use warm water, an all-purpose cleaner, and a disposable cloth.

Removing lead paint can be a dangerous process overburdened with different solutions and risks. As a result, a lot of people ask for help from professional services like  the expert team at Steamy Concepts, who are specialists in lead and paint removal. Our staff members are trained to provide you and your house with only the greatest customer service, both on the field and in the office. Don’t hesitate to reach out!

FAQ

Is stripping lead paint dangerous?

Yes. If proper safety measures aren’t taken, lead paint particles could get airborne and end up in someone’s mouth, eyes, or nose. They can also leak into the carpeting, flooring, furniture, and air conditioners or endanger your family’s health.

Should you remove lead paint or paint over it?

It is recommended that you should remove lead paint and no longer paint over the lead paint. The application of fresh paint, this method will cause the existing paint to peel and flake. You must stop the emission of lead dust right away if the house begins to exhibit paint failure symptoms, such as peeling and scorching.

Is lead paint difficult to remove?

Lead paint removal is considered a difficult task for the average homeowner attempting a do-it-yourself effort. This job requires specialized materials and equipment in addition to specialist training to be completed properly and safely.

What happens if you scrape off lead paint?

If you scrape off lead paint, it can be extremely dangerous. These activities disperse tiny lead dust into the air. The greatest danger of lead exposure is for infants and young children living in homes built before 1960 (when lead-based paint was frequently used).

The Best Approach to Cleaning Fabric Furniture & Preventing Stains

The furniture is not only there to fill in the blank spaces in our home but also reflects our lifestyle. In fact, on most occasions, the couch is our go-to place for midnight snacks and afternoon naps.

On that note, knowing how to clean furniture fabric is a must for all binge watchers and remote workers, especially since we’re prone to accidents, such as coffee spills.

We all know fabric furniture can be tough to clean, but you can now use our step-by guide to help you get rid of the stains in a flash. We also included some tips on protecting the material from smudges.

How to Clean Furniture Fabric?

When it comes to getting rid of the stains from your furniture, the first thing you need to do is check the fabric’s cleaning tags. You will find them under the cushions. Once you locate the tags, you’ll notice they contain one of the following symbols — “W,” “S,” “S/W,” “WASH,” or “X”.

Each symbol denotes a different cleaning approach:

  • W” stands for water. In other words, you must clean the fabric using only water-based mixtures, such as washing-up liquids, soaps, and carpet-cleaning solutions. To avoid damaging the interior, use distilled water and blot the fabric with a damp rag. You should never use harsh chemicals, like rubbing alcohol, since they can harm the exterior.
  • S” represents solvent, which indicates you must use water-free solvents, like rubbing alcohol and dry-cleaning purifiers. You can also use baby wipes if you’re dealing with vinyl or leather fabric. “S” also stands for linen, silk, cotton, and wool fabrics.
  • S-W” stands for solvent and water, meaning you can use water-based mixtures, like detergents, shampoos, and dry-cleaning solvents, to get rid of the stains.
  • The “WASH” code implies the fabric is machine washable.
  • X” stands for vacuum, which means that you can only use a vacuum cleaner or a brush. If by any chance you have a sofa with the “X” tag, you probably won’t be able to clean it thoroughly by yourself. Instead, you’d have to turn to a professional cleaning service.

Now that you know how to clean fabric furniture by decoding the tags, let’s get into more detail.

Vacuum the Fabric

The first step in your cleaning journey starts with the vacuum cleaner. This way, you’ll eliminate the crumbs or pet hair from the exterior of your upholstery. Regular vacuuming will not only keep your furniture clean and odor-free, but it will also prolong its longevity.

What does regular mean? If the furniture is used often, for example, if you use your sofa on a daily basis, you should vacuum it every week. If your upholstery is located in rooms that you don’t use often, you can do this once a month.

Use appropriate vacuum cleaner attachments to clean all parts of the furniture, and don’t forget to remove the cushions. If you have leather furniture, use a dust brush extension.

Keep in mind that using a vacuum cleaner on delicate fabrics, such as linen, wool, silk, lace, or chiffon, could damage the upholstery. To avoid this, lower the suction level.

Use Baking Soda

Baking soda should be your go-to ingredient if you want to freshen up your furniture. To do this, put the baking soda on the surface of your sofa, and wait for at least 20 minutes before vacuuming it using a brush extension.

You can also use baking soda to clean the stains from your furniture. All you have to do is create a cleaning solution by mixing white vinegar (1 tbsp), dishwashing liquid (1 tbsp), warm water (1 cup), and baking soda (1 tbsp).

Use a clean cloth soaked with the mentioned solution and start rubbing the stain. Repeat the process until the stain is gone.

Use Water and Mild Detergent

If you want to remove grease stains from your furniture, mix 1 tbsp of liquid detergent with two cups of warm water. Use a microfiber cloth and tap the stains gently, don’t rub them. Once you get rid of the stain, dry the fabric.

You can also combine three-quarters of warm water with one-quarter of vinegar and 1 tbsp of dish soap. Put the solution in a bottle and sprinkle the stained areas. Use a dry cloth to scrub the stain. Once the strain is gone, use a damp cloth to remove the soap.

Use Rubbing Alcohol

If you’re having problems getting rid of ink stains from your furniture, you need to put some rubbing alcohol on a white cloth. Keep in mind that you must tap the fabric, not rub it. This way, the ink will transfer from the fabric into the cloth. Once the strain is gone, use a wet cloth to clean the area from alcohol and dry the fabric.

Hire Professionals

If you’re dealing with mold and hard-to-clean stains, like grass, permanent markers, or red wine stains, you should hire professionals. Start by calling them and arranging a free examination to determine which course of action should be taken.

For example, fiber protector services, such as Steamy Concepts, use special equipment, like HEPA vacuums and air scrubbers, in addition to antimicrobial solutions designed specifically for mold stains. They also deal with asbestos and lead paint removal.

That said, professional cleaning services utilize fabric-friendly cleaners suitable for all types of materials that will not change the look of the fabric. Plus, they use steam to dry the furniture, which means your couch will be ready to use within a few hours (depending on the material).

How to Protect Fabric from Stains?

While it’s impossible to keep the dirt away from your furniture, there are a few things you can do to keep them clean and protected:

Regular Maintenance

Our furniture gets dirty each time we use it, so it’s vital to clean it regularly using a vacuum or a brush. This way, you’ll get rid of accumulated dust, which can cause allergies. Moreover, if you have pets, you should use a lint brush and pet smell removals.

Use Fabric Protector Sprays

Fabric protector sprays come in many forms. For example, some products are designed specifically for natural or synthetic fabrics, while others come with multipurpose formulas. In other words, you can use them on various materials.

However, to be on the safe side, test the spray on a small area to make sure it doesn’t affect the texture or the color of the fabric.

Fabric protector sprays offer full protection only when they are completely dried. In some cases, they will dry in less than 10 minutes, and in others, you might have to leave them overnight. On that note, opt for a spray with a quick-drying formula if you need to use the furniture immediately.

Keep in mind that the sprays need to be reapplied every six months.

Use Slipcovers

How to prevent stains without breaking the bank? Invest in slipcovers. Slipcovers come in many styles and colors, so you won’t have any problems finding the one that fits. They are also easy to set, you can put them in a washing machine, and they can last for up to five years if maintained regularly.

Get Stain Resistant Furniture

The easiest way to protect your furniture from potential strains is to buy upholstery made of stain-resistant materials, such as synthetic fibers (polyester, nylon, acrylic, rayon, olefin) and wool. Synthetic fibers are easy to clean, and they can protect your furniture from moisture, odors, and mildew.

The Optimal Solution

Now that you know how to protect furniture from stains and how to clean it using homemade stain solutions make sure to do regular maintenance. In addition to that, always check the cleaning tags before you start scrubbing to avoid damaging the fabric.

And if the situation hasn’t gotten a bit out of hand or you simply don’t have the time to do it yourself, let us at Steamy Concepts handle things for you!

FAQs

What is the best way to clean fabric chairs?

First, you must vacuum or brush it to eliminate the dust and crumbs. Then, depending on the fabric type, you should use water-based mixtures or water-free solvents to eliminate the stains.

You can also use baking soda to remove the smell. Just sprinkle the soda all over your chair and leave it there for about 20 minutes. The last step is to clean the baking soda using a vacuum cleaner with a brush extension.

How do you clean old furniture fabric?

Leave it outside for a couple of hours to air out. Now, use a vacuum cleaner multiple times since old furniture tends to have more than accumulated dust.

Use disinfectants to clean non-fabric parts. However, avoid substances that contain bleach since it can damage the wooden parts of the furniture. If there are stains, use water-free or water-based solvents to remove them. If there’s mold, hire professional cleaning services like Steamy Concepts.

How do I stop my furniture from staining?

Take care of your furniture by vacuuming it at least once per week and use fabric protector sprays or slipcovers. Likewise, you can acquire stain-resistant furniture made of synthetic fibers or wool.

Can you make fabric stain-resistant?

Yes, you can. You can buy a new fabric that’s made of stain-resistant materials, like rayon, polyester, acrylic, olefin, or nylon. In a similar manner, you can use fabric protector sprays. However, you would need to reapply them every six months.

The Essential Guide to Drying a Carpet after Cleaning: Best Tips & Tricks

Carpets work like air filters that absorb dust, pet dander, and dirt we bring inside the house. Besides regular vacuuming, giving these surfaces the occasional scrub is also important in keeping them clean. Carpet fibers have a certain capacity to trap and hold contaminants but they also tend to release these contaminants into the air again.

Households with high foot traffic and pets should deep clean the carpeting every 2 months to get rid of all the grime, stains, and crumbs that wind up on it. With regular upkeep, you’ll have bright, fresh-smelling carpets and a healthy living environment.

But cleaning the carpets thoroughly also means they will be wet for some time. And, if you don’t let them dry off properly before using them again, your carpet might end up ruined or infested with toxic mold.

Read our full guide on how to dry a carpet after cleaning fast, and where to seek professional service if taking care of your carpet is too demanding.

Can You Walk on Wet Carpet after Cleaning?

When you walk on a freshly cleaned and wet carpet you risk flattening the fibers and leaving traces all over that might stay that way after it dries up. So, it’s best to avoid stepping on damp carpets, but if you must get across the room, do it barefoot. Otherwise, leave the carpet to dry off entirely – a few hours should do – before you set foot on it again. If using a professional approach, keep in mind that your carpet might need a full day before it is entirely dry.

Can You Put Furniture on a Wet Carpet?

Placing heavy furniture on wet and damp carpets will potentially ruin or squish the fibers and leave dents in the carpet. Ideally, you want to wait for the carpet to dry completely before moving furniture on it, especially if you have some hefty furniture pieces like sofas and cabinets. Just like you would avoid placing furniture on a wet carpet, also avoid letting your pets walk on the carpet since their fur might end up tangled in the wet fibers.

How to Dry Carpet after Cleaning?

There are different methods you can try to extract excess moisture from a freshly cleaned carpet. For instance, you can take advantage of the natural airflow or use designated drying appliances to move the air and take away the humidity.

But, how long does it take for a carpet to dry? Well, after a professional cleaning session, carpets are a little damp because all the water is extracted with a suction machine. So, it will take 2-4 hours for your house to be completely functional.

In other cases it, might take 24 hours or even longer for all the moisture to evaporate, depending on the weather conditions and drying methods listed below.

Open the Windows

Open all the windows in the house to allow natural airflow that will take away the moisture released from the carpet. It would be ideal to have windows that are opposite each other because it creates a strong draught. Consider taking the rugs and standing mats outside to dry in the sun.

Turn on the Fans

Another way to create a drying airflow is to turn on the fans in the house. This is a great method for unfavorable weather when you can’t count on warm air to carry away the humidity.

Ceiling fans are ideal as they blow the air directly at the carpet underneath. But, you can also use standing fans or table fans on the opposite sides of the room to get the air to circulate faster.

Put the AC on

Air conditioning doesn’t create as much air circulation as fans, but anything that makes the air move is useful. Air conditioning helps carpets dry by removing the humidity even from the deepest fabric layers. To get the humidity up in the air, you will have to provide more heat or air motion. Here, ACs are a good option to consider, but only if paired with other drying methods.

Get a Professional Blow-dryer

If you have professionals clean the carpeting, you can ask for an additional service of blow-drying the carpets. They will use equipment to blow hot air quickly over the carpets to jumpstart and speed up the drying process.

Run a Dehumidifier

Dehumidifiers are powerful tools for drying wet carpets. They are specially made for removing humidity from the air. Not to mention, you will get the best results if you use a dehumidifier together with ceiling fans or ventilation fans.

Fans make the air circulate faster and the dehumidifier will create a dry environment that allows the carpet to release moisture faster. Place a portable humidifier in strategic corners and let them do the work. Make sure to empty the water tank as soon as it fills up.

The only downside to using dehumidifiers is that they can be an added expense if bought specially for drying your carpeting.

Expose the Padding

Wall-to-wall carpets are secured with padding that can soak up a lot of water and is very hard to dry completely. The danger here lies in the possibility of developing mold or mildew that can ruin the carpets and pollute the air in your house.

If you notice the padding is soggy, try pulling the carpet fibers to expose them to more air. It is best to start at the corners where you can easily take hold of the carpet surface.

You will need pliers to remove any staples used to attach the fibers to the padding. Don’t use too much force so as not to tear the fibers. Check the padding for dampness as you go and decide whether to remove the whole carpet or just expose particularly wet spots.

Rent Air Movers

Air movers are ideal for drying carpets, as well as all flat surfaces, and hard-to-reach areas. They produce a strong, focused airflow that can be adjusted to blow at different angles.

If you don’t already have one, you can rent them or look for budget, lightweight options for home use. Place the air movers facing especially wet areas of the carpet or the exposed padding for quick results.

Turn on a Heater

During wet, cold winter days it is best to turn up the heating in your house to aid the drying process. You can use additional electric fan heaters that will both heat and move the air. Here, you want to open the windows from time to time to let the moisture out of the house.

How to Get Carpet to Dry Faster?

Making your carpets dry faster is not only a matter of convenience but also a matter of preventing health hazards that come from damp carpeting and padding. The methods for speeding up the carpet drying process vary based on the weather conditions and the available equipment you use for the purpose.

When doing it on your own, you want to ensure that whichever drying method you use, the carpets will be entirely dry before they are ready to use again.

All things considered, hiring a professional carpet cleaning service is the fastest way to have the carpets deep cleaned, dried, and ready to use.

A Trusted Carpet Drying and Cleaning Service for You

Steamy Concepts is your leading provider for all things carpet maintenance. As a top servicer, we use advanced methods that deep clean all types of carpets – and leave them entirely dry after the process.

Equipped with the most professional truck-mounted steam cleaning technology, we will make sure you get a squeaky clean and dry carpet – in excellent condition and at a fair cost!

With 20+ years in the carpet cleaning business, Steamy Concepts provides a supreme carpet cleaning service and the fastest drying time.

Feel free to book your service online and access all the exclusive deals we offer!

FAQ

What is the normal dry time after the carpets are cleaned?

The usual time for drying after a professional deep clean is 2-4 hours. Depending on weather conditions it may take a bit longer on rainy, cold days. Sometimes, a carpet might need up to 24 hours to dry, especially if it has been deep cleaned.

How can I make my carpet dry faster after cleaning?

The 3 critical factors when it comes to drying anything, including your carpet, are temperature, airflow, and humidity. Make use of all three to get your carpets to dry faster.

Can carpets be dry-cleaned?

Carpets can be dry-cleaned but the process involves certain chemicals that leave a residue on the fibers. That can trigger allergic reactions, so if you have kids that spend a lot of time on the carpet, it is better to avoid dry-cleaning.

Should you open windows after carpet cleaning?

It is definitely recommended to do this. After all, you need as much air circulation as possible, so open the windows to increase the airflow and encourage the carpet to dry faster.

Can You Remove Pet Stains from Carpet?

Lovable as they may be, pets are also known to make quite a mess on occasion. Urine pet stains on the carpet are a common issue when you own a pet, especially if that pet is still in potty training. Other pet carpet stains you might deal with at some point include vomit, poop, mud, or debris stains.

Cleaning pet stains from a carpet can be a tedious process especially if you don’t react on time. Luckily, we have just the guide to help you learn how to remove pet stains from carpets.

How to Remove Pet Stains from Carpets?

When attempting to remove, for example, vomit or pet urine from the carpet, it is critical to sterilize and deep-clean the problem area. The more pesky the stain is, the longer it will take to get rid of it and restore your carpet. When the carpet is still wet, soak up as much of the stain as possible, to both remove the odor and prevent soakage. But, removing urine or vomit odor from carpets can be quite tricky, and the smell might linger on even after you are done cleaning.

To help prevent that, follow these steps for efficient pet carpet stain cleaning:

Get Rid of the Mess

If the affected area is still moist, absorb the liquid with paper towels. Then, use warm water and a towel to clean the affected area or a wet/dry vacuum. Try not to press anything further into the fibers. Working quickly, especially with vomit or urine stains, is crucial since the acid found in both urine and vomit can discolor carpet fibers.

Remove the Stains

There are numerous methods for getting rid of a pet stain on your carpet. As a strong disinfectant, you can use vinegar to clean a variety of surfaces in the house. You can combine a solution of 50% white vinegar and 50% water in a spray bottle. The vinegar will neutralize the stains and eliminate most of the smell.

Make enough solution so you can deeply soak the affected area. Spray enough of the solution onto your stained carpet and use a soft brush to scrub the carpet lightly, without damaging the fibers. A toothbrush works well for small spots, but a larger brush is required if the stains are extensive. Use a clean cloth or paper towel to pat the area dry.

Remove the Odor

If the stain or smell persists after cleaning with a vinegar solution, try mixing baking soda and hydrogen peroxide. When mixed, baking soda and hydrogen peroxide will kill bacteria and remove smells at the same time.

To do that, first cover the stained carpet area with baking soda. Then, combine two cups of water with 1/2 cup of 3% hydrogen peroxide in a spray bottle. For more cleaning power, add a teaspoon of dishwashing detergent. Spray the stains thoroughly and scrub them off well. Let the area dry before vacuuming any leftovers.

How to Clean Feces Carpet Stains

You can be successful in Getting pet feces out of carpets if you use the right products. Aside from a plastic bag and vacuuming, here is what else you’ll need to remove feces carpet stains.

  • Dish sponge. Use it to scrub off pet feces from the carpet. As an alternative to the dish sponge, you can also use an old rag.
  • Toothbrush. A soft-bristled toothbrush is an effective way to get rid of feces stains. It’s wise to wear gloves, so your hands are protected while cleaning.
  • Vinegar. White vinegar can help you remove feces stains from the carpet. Soak the stain in vinegar, let it take effect for a bit, and finish cleaning.
  • Baking soda. Baking soda is typically used in the last stages of carpet stain removal. It mainly serves as a way to remove pet odors from the carpet, alongside any bacteria. After using a vinegar and water solution, proceed to apply the baking soda to the affected area, and allow it to dry off completely. This will both deodorize and sanitize the carpet, leaving it stain- and smell-free.

How to Clean Vomit Stains from Carpet

The acid found in pet vomit can quickly stain or damage a carpet, so you need to clean it at once.

First, remove the big chunks with a scraper or dustpan. Then, soak up the moisture using dry towels. Now, make a cleaning solution. Combine 2 cups of lukewarm water, a tablespoon of salt, a tablespoon of dish soap, and half a cup of vinegar. Apply your solution to the area using a soft cloth. Repeat several times to remove the stains. Once removed, finish cleaning the area with a wet towel. Let the area dry off and vacuum if needed.

How to Get Dried Pet Stains From Carpets?

Sometimes, we might miss a vomit, urine or dirt stain and find it dried off completely. To clean dry stains, first, deep-rinse the area with water. Then, use a wet-dry vacuum cleaner. Avoid using a steam cleaner here because the heat will permanently set the smell and stains. Also, instead of using a wet-dry vacuum, you can repeatedly moisten the spot with warm water and towels.

If this doesn’t help, try using an enzymatic cleanser. The bio-based cleaners break down and eliminate stains and smells. Choose a cleanser that works on a molecular level, and is designed specifically for this type of stain.

Does Professional Carpet Cleaning Remove Pet Stains?

If you tried everything to clean a pet carpet stain and failed, it would be wise to turn to professional carpet cleaners next. Especially when it comes to more stubborn or older pet carpet stains, a professional approach is recommended since it will get the job done without causing harm to the carpet.

How Will Professional Carpet Cleaning Remove Pet Stains?

Professional carpet cleaners have advanced products, and professional experience to remove all types of stains and pet odors. Before cleaning your carpet stains, a professional provider will estimate the stain severity and origin, as well as the carpet fabric and thickness.

Based on this estimation, the provider will devise a solution that will leave your carpet stain-free and intact. Along with stains, a professional will also help remove lingering odors from the carpet.

Steamy Concepts: Tucson and Phoenix: Pet Stain & Odor removal services

Steamy Concepts is a professional carpet cleaning service provider in the Tucson and Phoenix area. Our experienced professionals offer fast and high-quality service that leaves your carpet squeaky clean and stain-free.

Our tailored pet damage removal system is safe and efficient and comes with a 30-day money-back guarantee. We use the best and most advanced equipment for the cleaning process. Our carpet cleaning process includes only natural and chemical-free solutions. Learn more about our offer and schedule your appointment online or give us a call!

FAQ

Can pet stains be removed from a carpet with deep cleaning?

Carpet cleaning can effectively remove pet stains if treated with the proper equipment. Deep cleaning can remove urine, vomit, debris, and other pet stains from carpets.

How long does it take for carpets to be professionally cleaned?

On average, an experienced carpet cleaning technician would need half an hour for a room. Of course, this time can be increased if additional house areas, such as carpeted stairs or a hallway, are included in the process.

Should you vacuum before your carpets are professionally cleaned?

Yes. We recommend vacuuming your carpet before it is professionally cleaned. Vacuuming aids in the removal of tracked-in pet dander, dirt particles, and hair strands.

Is it cheaper to clean the carpet from pet stains or replace it?

Replacing a carpet is a pricier solution than cleaning it. The cost of carpeting is determined by the type of carpet you choose. An estimate would be $2 per square foot of the carpet, with some high-end carpets costing up to $100 per square yard. The average carpet cleaning might estimate at around $45 per room.

How long will a clean carpet last?

By cleaning your carpet regularly, you can extend the life of your carpet to 10 or 15 years. This helps you both save up on having to buy a new carpet and ensures you won’t have to deal with persistent pet stains. For maximum longevity, clean the carpet once a year.

What’s the best carpet cleaner for pet stains?

Ideally, natural solutions – vinegar, water, baking soda – are the best pet stain carpet cleaners. There are designated carpet cleaning products as well, but these tend to use chemicals and should be avoided.

When should I contact a professional pet stain carpet cleaner?

If you cannot eradicate the pet carpet stain yourself, hiring professional carpet cleaners to clean is recommended. When choosing a provider, ensure they offer a designated pet stain carpet cleaning service, not just a general cleaning service.


How to Choose Carpet Cleaning Services in Green Valley

How to Choose Carpet Cleaning Services in Green ValleyMaintaining overall home hygiene might be easier said than done, especially when it comes to carpet cleaning. Typically, carpets can be tricky to clean since the material they are made of is prone to collecting bacteria, debris, and dirt. Sometimes, a regular carpet cleaning is not enough to ensure its cleanliness.

Residential and commercial property owners are on the constant lookout to find the best solution to keep their carpets clean. Whether you are looking for a carpet cleaning Green Valley provider for the first time or want to change your current service, there are certain quality factors to consider first.

The most important thing to keep in mind is that you need to find a trustworthy cleaning service that will do wonders for cleanliness and comfort. An unfavorable cleaning service might leave your carpet in a desperate state as time goes by. To ensure you are going with a trusted carpet cleaning servicer, here is what to know ahead of time.

Check Certifications and Licenses

Cleaning services that operate in residential and commercial properties must have all necessary certifications, insurance, and licenses to perform a stellar service. This is important both for the service provider and for the service receiver.
Here are a few tips on how to manage this process and ensure the provider you choose is certified to perform carpet cleaning services.

Ask for the Right Certification

Having the right licenses and certifications means that a company has gone the distance to bring its customers the best high-quality service. These certifications are not easily received so companies that have them have put in the extra effort. The institutes that provide premium certifications to top-ranking cleaning service providers are:

  • Carpet and Rug Institute (CRI) – educates and informs servicers and consumers on carpet and rug issues. They provide useful information on environmental efforts, and health benefits, and offer advice, alongside updates on current trends.
  • Better Business Bureau (BBB) – an organization with a rating system for businesses, the BBB handles consumer complaints. Getting a BBB accreditation requires transparency, appropriate licensing, and no unresolved customer complaints.
  • Institute of Inspection, Cleaning, and Restoration Certification (IICRC) – standard-setting organization dealing with cleaning, restoration, and inspection industries. Their certifications vary from carpet cleaning technicians to commercial carpet maintenance technicians, house cleaning technicians, and more.

The Importance of Carpet Cleaning Insurance

When searching for the right Green Valley carpet cleaning service provider, ask for liability coverage. This way, you’ll know that you are protected in case of a mishap or another issue. Having insurance also means that companies follow strict and detailed background check protocols during the recruitment process of their employees. Cleaning is a rather straightforward process, but one can never be sure, so it’s best to be on the safe side.

Provider Experience Matters

Entrusting someone with the cleaning of your expensive and delicate carpet entails turning to professional and experienced providers. The cleaning industry is not an exception when it comes to scammers and frauds. Reputable companies with decades of experience have managed multiple clients and know a lot about customer service. They know exactly how to attend to your specific needs and how to take care of their clients.

Ideally, you want to look for carpet cleaning in Green Valley AZ with a solid reputation. Interestingly, choosing efficiency and quality over affordability and convenience will save you time and money in the long run. Experienced cleaning companies can make a quick assessment of your property and identify the right course of action for resolving a certain issue. They will be able to give you a quick and proper offer that will include the price, tools, and manpower for the job.

Another important thing when it comes to experienced providers is their longevity. Being around for some time means a provider is able to offer a range of services that newly started companies don’t. At the same time, experience leads to the possibility of following trends and easily adapting to the use of safer and eco-friendly tools.

What Types of Carpet Cleaning Do Professionals Offer?

Carpet cleaning companies offer a whole range of services. When experienced, they are able to detect the needs of customers and tailor their service based on their assessment, There are several types of carpet cleaning services that may be offered by the provider.

One of these services will be selected as the most suitable option for your case. To understand what the carpet cleaning company is offering, you need to also understand what each method or technique includes. Here is a short overview of the carpet cleaning methods out there:

  • Dry powder cleaning. Uses a pre-prepared mixture sprinkled on the carpet which turns into clumps that dissolve and absorb dirt. All debris is thereafter vacuumed.
  • Encapsulation cleaning. This is a low-moisture method that uses a chemical that absorbs the carpet and encapsulates the dirt, later removed by additional vacuuming.
  • Steam or hot water extraction. A method using chemicals and high water temperatures to saturate the carpet and break down and vacuum dirt and bacteria.
  • Bonnet cleaning. Low moisture technique that only treats the carpet surface with chemicals. A rotary scrubbing machine with bonnet pads is used to clean the dirt.

Despite these options, carpet cleaners Green Valley AZ are not limited only to carpet cleaning. They also specialize in tile and grout cleaning, pet and odor removal, rug cleaning, water damage removals, and more.

How Much Do Professional Carpet Cleaners Charge?

Hiring a reputable cleaning company might come with a cost, although carpet cleaning service costs tend to vary based on various factors.

In terms of choosing the leading Green Valley AZ carpet cleaning service providers, you’ll find the average carpet cleaning price to range at $45 for a 250m2 room.

Keep in mind that prices change based on your specific requirements. The carpet type, room size, and cleaning method used are just a few of the factors that will affect the price. So always ask for a quote that is tailored to your specific needs and requirements.

Steamy Concepts: Quality Carpet Cleaning Green Valley Trusts

Steamy Concepts is a cleaning company that first surfaced on the market in the 1990s. Decades of experience have made us the best Green Valley AZ carpet cleaning company in Tucson.

Our dedicated approach is backed by the BBB A+ and IICRC Certifications that we hold.
A licensed, bonded and insured company, we use only the highest cleaning products available on the market. Grease and grime don’t stand a chance against our professional tools and equipment. With the use of our patented carpet cleaning technique, you can say goodbye to all the pet damage caused to your carpets.

We provide high-quality services and customer care and satisfaction are guaranteed. Call our Phoenix of Tucson office today to get a free estimate!

FAQ

What type of carpet cleaning is best?

There are many carpet cleaning methods offered by cleaning companies. Customers can choose between carpet shampooing, dry carpet cleaning, bonnet cleaning, encapsulation cleaning, and hot water extraction.

The best carpet cleaning method is the steam cleaning method. It includes pre-vacuuming the carpet and pre-spraying tough spots with a spot treatment formula. With the use of steam cleaning technology, any lingering bacteria and dirt left behind after the spot treatment will be eliminated. Once cleaned, the carpets will need time to dry before they are used again.

Is a professional carpet clean worth it?

Yes. No matter how well you care for your carpets, professional carpet cleaning companies have the best technology to make your carpets look clean, fresh, and as-new. Professional cleaners will make sure that the lifespan of your carpets is prolonged. You will have better-looking carpets and in case of damage, professionals will restore the carpet to its former glory.

Persistent stains and foul odors will be a thing of the past with a professional carpet cleaning service. Experienced carpet cleaners will come equipped and prepared for any disastrous conditions and salvage the situation. Especially if it comes to more delicate carpets and materials, hiring a professional cleaner is the recommended route to take.

How often should the carpet be professionally cleaned?

As a general rule, carpets should be cleaned by professional cleaners at least once a year. Carpets are the home of dust, dirt, allergens, and other types of contaminants, all of which can pose a health threat. Cleaning them regularly means maintaining a healthy environment.

However, other factors will also determine the frequency of hiring professional carpet cleaners. One of the major reasons will be high foot traffic, wearing shoes in the house, and whether there are any pets in the house that can be the reason behind stubborn stains and lingering odors.

Regarding health issues, if there are smokers and children in the house and there are family members with allergies, it’s advised you do a professional carpet cleaning more often. Commercially used carpets might require more frequent cleaning as well, given their ongoing usage and exposure to dirt.

Everything You Need to Know about Deep Carpet Cleaning

Steamy Concepts Everything You Need to Know About Deep Carpet CleaningEvery homeowner faces the challenge of maintaining their home clean. And while you may be keeping all the other parts of the house spotless, carpets require more dedication to clean properly. Carpets can be a nesting place for many germs and bacteria which may cause allergies and other health-threatening conditions.

But in terms of deep cleaning carpets, what is there to know? Well, only vacuuming carpets regularly and removing a stain here and there won’t do since sometimes deep carpet cleaning is due. Now, what is deep carpet cleaning?

Most homeowners entrust deep carpet cleaning to professionals, but sometimes you can do your own cleaning. Read as we share more about what deep carpet cleaning is all about and how you can clean your carpet like a professional.

What is Deep Carpet Cleaning?

Deep cleaning is not the regular carpet cleaning that you do every other day, meaning vacuuming and the occasional stain removal. It is a much deeper process that involves the thorough extraction and removal of dirt, cleaning of persistent stains, and removing unbearable odors from carpet fabrics.

Deep carpet cleaning is an important step in maintaining carpets hygienic and involves detailed cleaning and deodorizing of the surface. The ultimate deep clean involves extracting outside contaminants and allergens nestled deep inside the carpet.

Deep Carpet Cleaning Methods

Not all carpets are made the same. Some are sturdy while others are delicate and need special treatment and care. Also, carpets can be made of different fabrics and materials, which might require extra attention, especially if they are prone to collecting germs and bacteria.

This brings us to the different types of carpet cleaning methods that will remove dirt, contaminants, and odor from your carpet. Here are a few ways to deep clean a carpet.

Encapsulation Cleaning

Before applying an encapsulating chemical, the carpet needs to be vacuumed well. Using an adequate machine, the chemical absorbs and encapsulates the debris and dirt from the carpet, and then vacuums it. Because it is a low-moisture method with minimum downtime, it is a great option for commercially used carpets that get high foot traffic.

Bonnet Cleaning

Another low moisture technique is used to treat only the carpet surface. It is often used on very thin carpets getting high foot traffic. The carpet is sprayed with a self-neutralizing detergent followed by a rotary scrubber with an attached dry cotton bonnet pad. The carpet is dry in about 30 minutes.

Steam Cleaning

Likely the most common deep carpet cleaning method, it uses steam at high temperatures as well as pressure to remove dust mites, doors, and bacteria. The method can be used for residential and commercial carpets. The process includes using vacuums with hot water and chemicals for saturating the carpet. During this process, dirt is broken down and vacuumed.

Benefits of Deep Carpet Cleaning

If you are wondering why deep carpet cleaning is important for your health here are some of the key benefits it offers – health-wise and otherwise.

Prevents Mold Growth

Carpet fibers tend to soak water in homes with high humidity levels. This in turn encourages mold growth and the risk of developing respiratory problems. Professional carpet cleaners use drying elements that remove moisture and mold and prevent the appearance of new growth.

Eliminates Dust Mites

You may think you are an exception, but dust mites live in every home, invisible to the human eye. Due to their microscopic size, we often cannot identify the infestation and the cause of nasty allergies. It is actually their waste particles that do the harm, not the mites themselves. Applying high temperatures through steam cleaning is the best way to remove mites.

Removes Trapped Pollutants

Dust, allergens, dirt, and other pollutants are trapped in your carpets and can cause allergies and respiratory issues. Professional carpet cleaning services have a formula for removing trapped pollutants no matter the depth.

How to Do Deep Carpet Cleaning?

The best way to deep clean your carpet is to entrust the task to a professional service. However, if you are willing to try it yourself, here are some steps you can follow. Let’s break down the process step by step.

  • Step 1 – Vacuum the carpet multiple times and in different directions to get all the hair, dirt, and other particles out.
  • Step 2 – Follow the manufacturer’s instructions and fill the carpet shampooer with warm water and the appropriate cleaner.
  • Step 3 – Using the shampooer, vacuum the carpet. But be careful not to over-saturate it.
  • Step 4 – To dry the carpet faster, do several passes over the wet surface. At the same time open the windows or use fans for quicker drying.
  • Step 5 – don’t walk or put furniture on the carpet for the next six or more hours.

To keep the carpet clean and odorless, you need to maintain it regularly with frequent vacuuming. Ideally, deep carpet cleaning should be done every three months, unless the carpet requires more frequent attention.

How Much Does Deep Carpet Cleaning Cost?

Regardless of the deep carpet cleaning you do at home, there may still be some stubborn stains that you simply cannot remove. This is an excellent time to call a professional cleaning service to get those stains out. But how much does deep carpet cleaning cost and what does it entail?

Deep carpet cleaning prices vary depending on the cleaning method and the area size. Some charge a flat rate while others charge by the square foot. The Steamy Concepts’ price range varies from $45 for one room up to $180 for 4 rooms sized up to 250 sq ft. The prices tend to change depending on your needs and requirements.

Steamy Concepts: Top Choice for Deep Carpet Cleaning in Tucson and Phoenix

Getting dust mites, dirt, persistent stains, and lingering odors out requires the helping hand of a professional carpet cleaning service. Steamy Concepts is your trusted partner for clean carpets.

The Steamy Concepts team includes professionally trained technicians with extensive knowledge and skills. We also boast the latest carpet cleaning equipment to scare even the toughest stains away. We use Black Light technology for cleaning stains not visible to the eye.

Our high-quality and eco-friendly solutions are safe for children and pets. To make the most of our service and learn more, contact us at our Tucson or Phoenix office.

FAQ

How often should the carpet be deep cleaned?

Other than the regular vacuuming and cleaning to maintain the fresh look of your carpet, it is recommended to have it cleaned by a professional as well. Carpet cleaning services recommend that deep carpet cleaning be done between 12 months and 18 months.

The given period is based on general guidelines. The deep cleaning frequency will also depend on the foot traffic on the carpet and other factors, like the carpet fabric, size, etc.

Does deep cleaning carpet remove stains?

Tough and persistent stains cannot be removed with simple and regular carpet vacuuming. Deep carpet cleaning is the answer to removing these stains as it involves a more vigorous approach. But deep cleaning is not meant only for removing tough stains and dirt. It also revitalizes the carpet fibers and makes them feel better underfoot.

How long does it take for carpets to be professionally cleaned?

A precise time on how long it takes to clean a carpet because every cleaning process is unique. An average estimation would be between 20 and 30 minutes for a professional technician to clean one room.

The variation in time is based on the furniture that should be moved and possible spot and stain removal treatments that need to be made. Other factors that influence the time are the size of your home, the carpet’s condition, and type, whether it is lightly or heavily soiled, and if there are any pet doors or stains.

Should you vacuum before getting your carpets professionally cleaned?

There is no need to vacuum the carpet before the arrival of a professional cleaning service. Unless you feel the need to do it. Carpet cleaning services will start by vacuuming the carpet before they proceed with the detailed cleaning process. Many homeowners fear that the use of outside vacuums can spread germs and bacteria. Still, reputable carpet cleaning companies are known to sterilize the equipment before and after every cleaning job, which ensures maximum safety and hygiene during the process.

Is it cheaper to clean the carpet or replace it?

Carpets are not a cheap investment and replacing them can get costly. Every piece of furniture in your home needs regular care and maintenance and carpets are no exception. If you take care of the carpet, vacuum it, and clean it regularly, then you should be able to enjoy it for a longer period. Also, scheduling professional deep carpet cleaning once a year will further add longevity to the carpet, and leave it fresh, replenished, and as-new. In the long run, cleaning your carpet regularly will pay off more than buying a new one.